Dear colleagues, what am I doing wrong? In all my attempts to create a multispectral orthomosaic from DJI P4 missions I get obviously segmented result. Does anyone encountered similar effects?

2 Likes
Welcome!
Sorry for the trouble! Could you please start with giving me a bit more information about your system?
For instance:
- Operating System and Version
eg: Windows 11, MacOS 15.1, Ubuntu Linux 20.04LTS, etc… - Hardware Specifications
eg: 32GB RAM, i7-6700k, NVIDIA GTX 1050TI OC, 1TB SSD, etc… - WebODM Install Method
eg: Native installer, Docker, Snap, GitHub download, compiled from source - WebODM/ODM Version
eg: WebODM v1.9.14 Build 63, ODM v2.8.6, etc… - Procesing Node
eg: Automatic, Lightning, local (node-odm-1), etc… - Screenshots demonstrating the issue/behavior/error messages)
I work on Windows 10, AMD Ryzen 5 3500U with Radeon Vega Mobile Gfx 2.10 GHz, 16 GB RAM (Huawei Matebook 13 indeed), WebODM 1.9.2 with default settings (node-odm-1). I choose Option Multispectral and run the task. It finishes correctly but when I import geotiff to QGIS I get segmented result with very unnatural colors for most trees. It looks a bit different inside WebODM viewer but it is segmented in the same way.
1 Like
Are you able to try on a current release? v1.9.2 is very old.
I have updated to the current WebODM 1.9.14. Nothing has changed. Result is the same with very slight differences. I even do not need to update the figure.
1 Like
We’re getting similarly poor results from our p4d multispec flights (WebODM 1.9.14). For example:
(and this is one of the “better” outputs)
We have plenty of multispec data we can share if someone wants to look into it.

1 Like
Please, share small dataset 200-300 images
1 Like
Here is an example of multispectral dataset.
https://drive.google.com/drive/folders/1uDQXIQXW3h6oYaps-EXOc2rNDNlzCUmm?usp=sharing
2 Likes
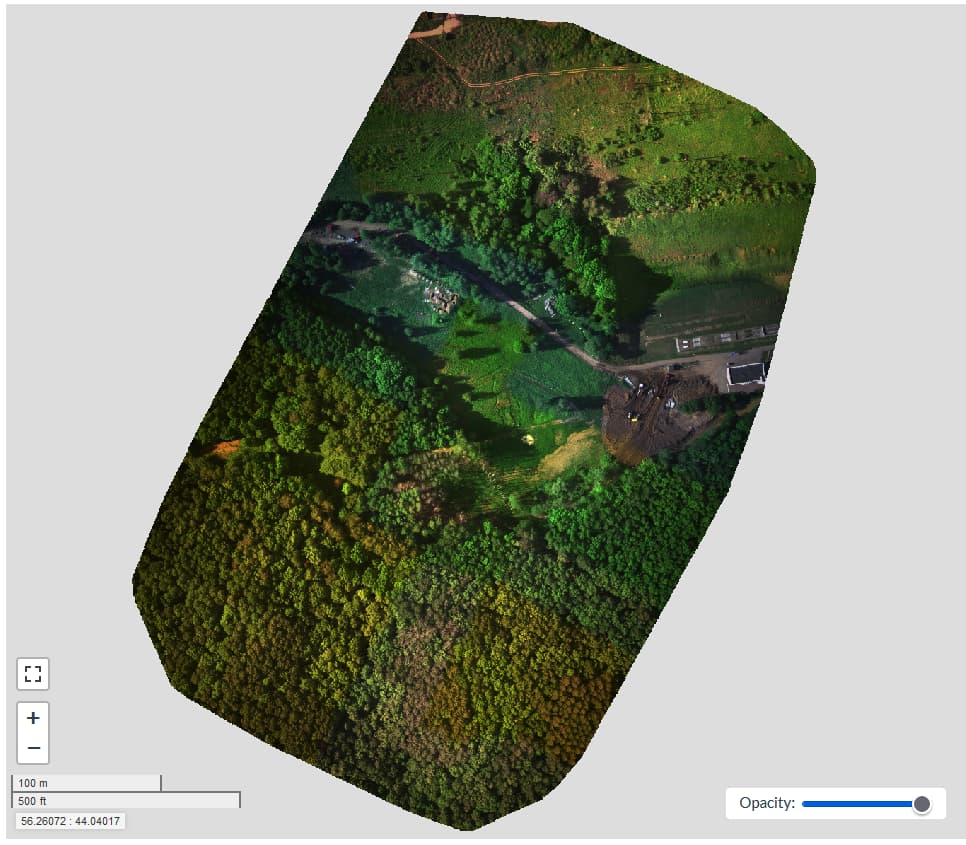
This one seems to reconstruct fine:
The purple color variations in the forest (strange?) seem to be due to intensity variation picked up by the red camera:

Are these images coming straight off from the P4 or have they been post-processed somehow?
Would be nice to have access to datasets to test whether this might be an issue with ODM or if it’s an issue with the input data.
1 Like
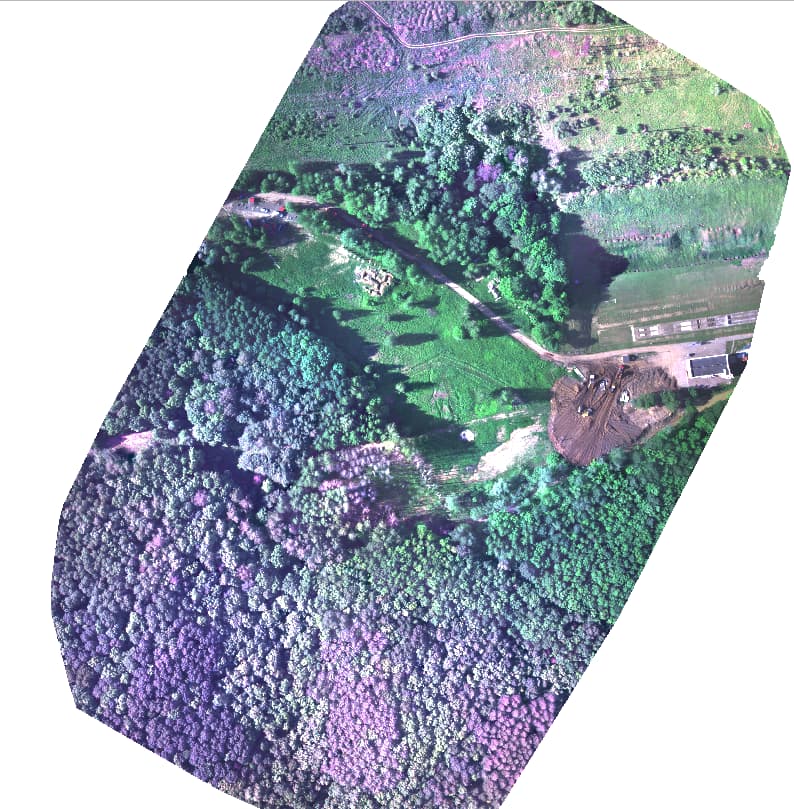
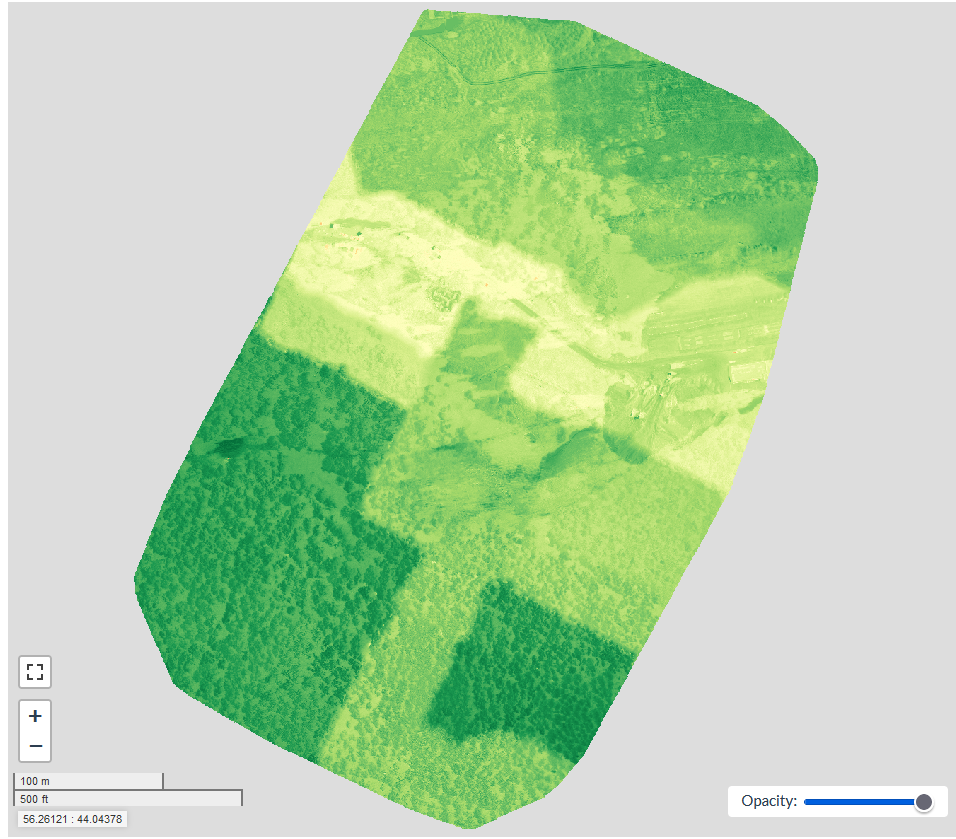
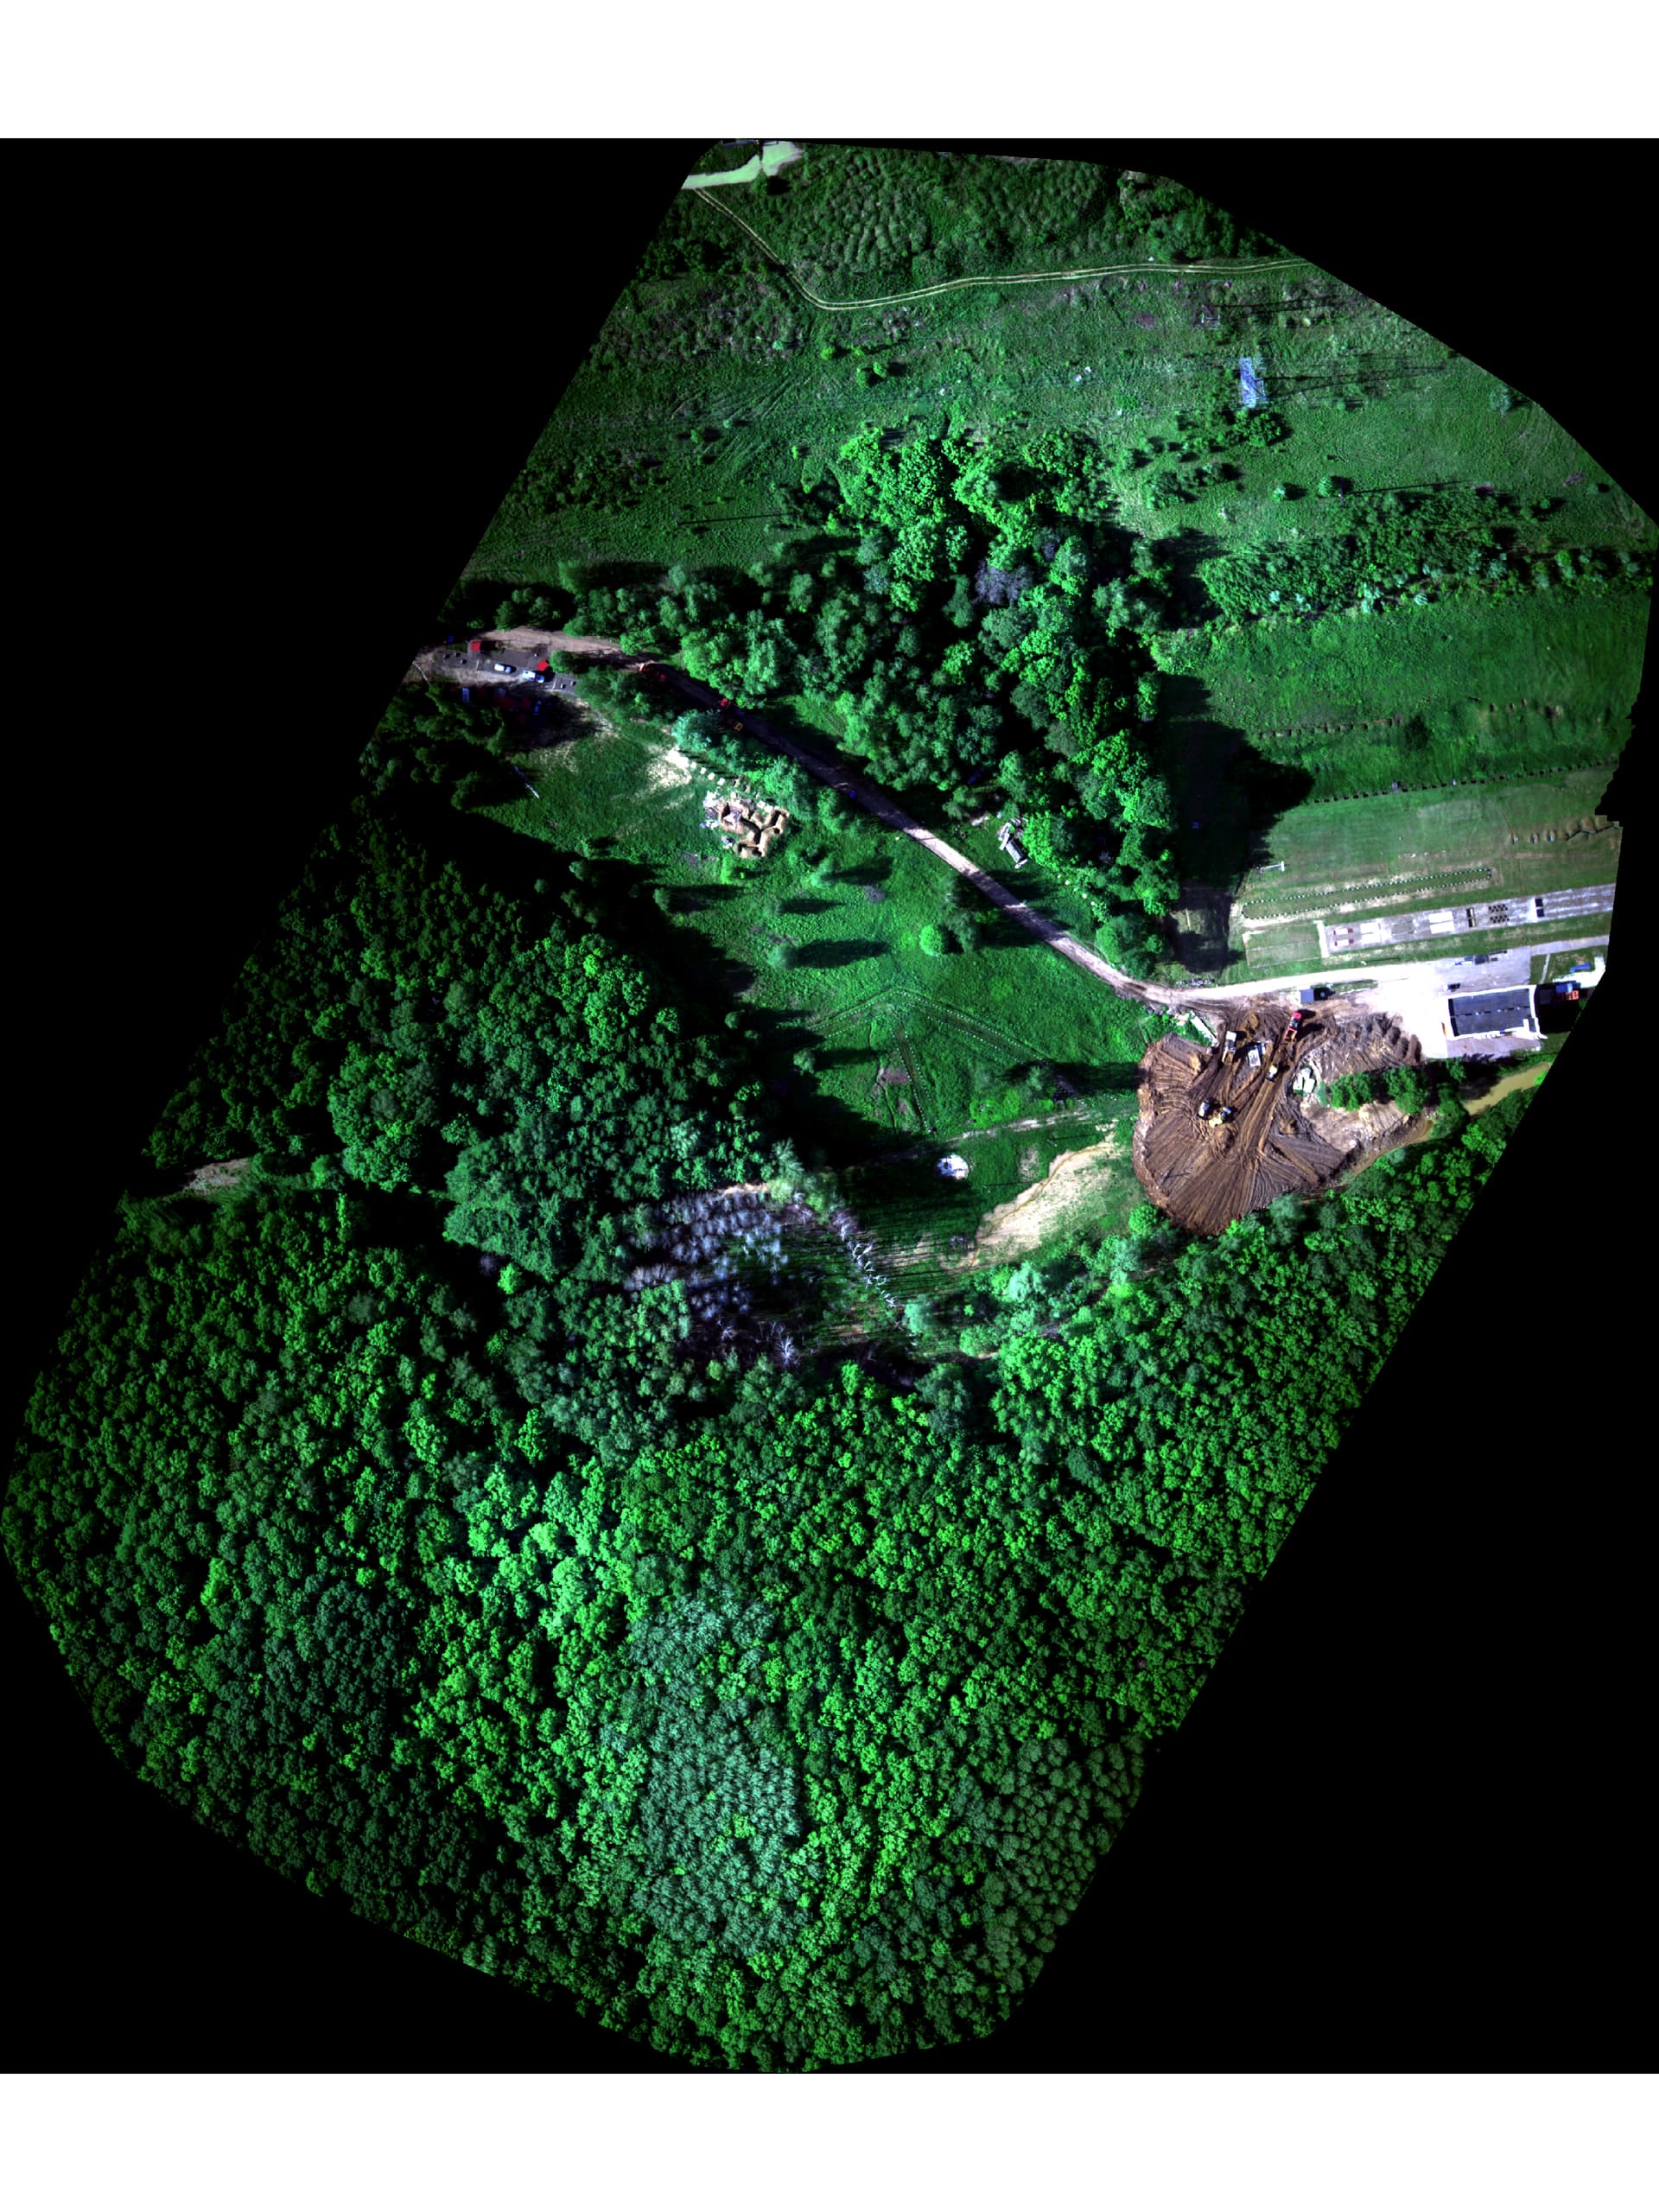
And here are results I get. Look quite different. Segmentation becomes obvious after switching to NDVI.
Images come straight from P4. No processing was applied.
1 Like

Are you using the latest version and what task options did you set? Did you resize the images? ( I didn’t in my test).
1 Like
Yes. I updated recently and use WebODM 1.9.14 launched from docker. I use default Multispectral settings without resizing images (they are already quite small due to P4 Multispectral camera).
1 Like
Try the Default preset instead of Multispectral. This might be some issue with the radiometric calibration option.
Edit: or due to texturing-skip-global-seam-leveling. Or both.
Edit2: seems due to texturing-skip-global-seam-leveling, which makes sense.
1 Like
The key issue is that turning off texturing-skip-global-seam-leveling is going to modify the pixel values to make a “pretty picture”, but the real issue is that the photos have probably been captured with different sun exposure (common) and radiometric calibration with sun+camera has only been tested with Micasense cameras (not sure if it works equally well with the P4).
1 Like
Yeah camera+sun doesn’t seem to be working.
Opened Add support for P4 camera+sun calibration · Issue #1483 · OpenDroneMap/ODM · GitHub
2 Likes
Processed with :
texturing-skip-global-seam-leveling:True
radiometric-calibration: camera+sun
whit this docker image
NDVI is calculated inside GRASS GIS
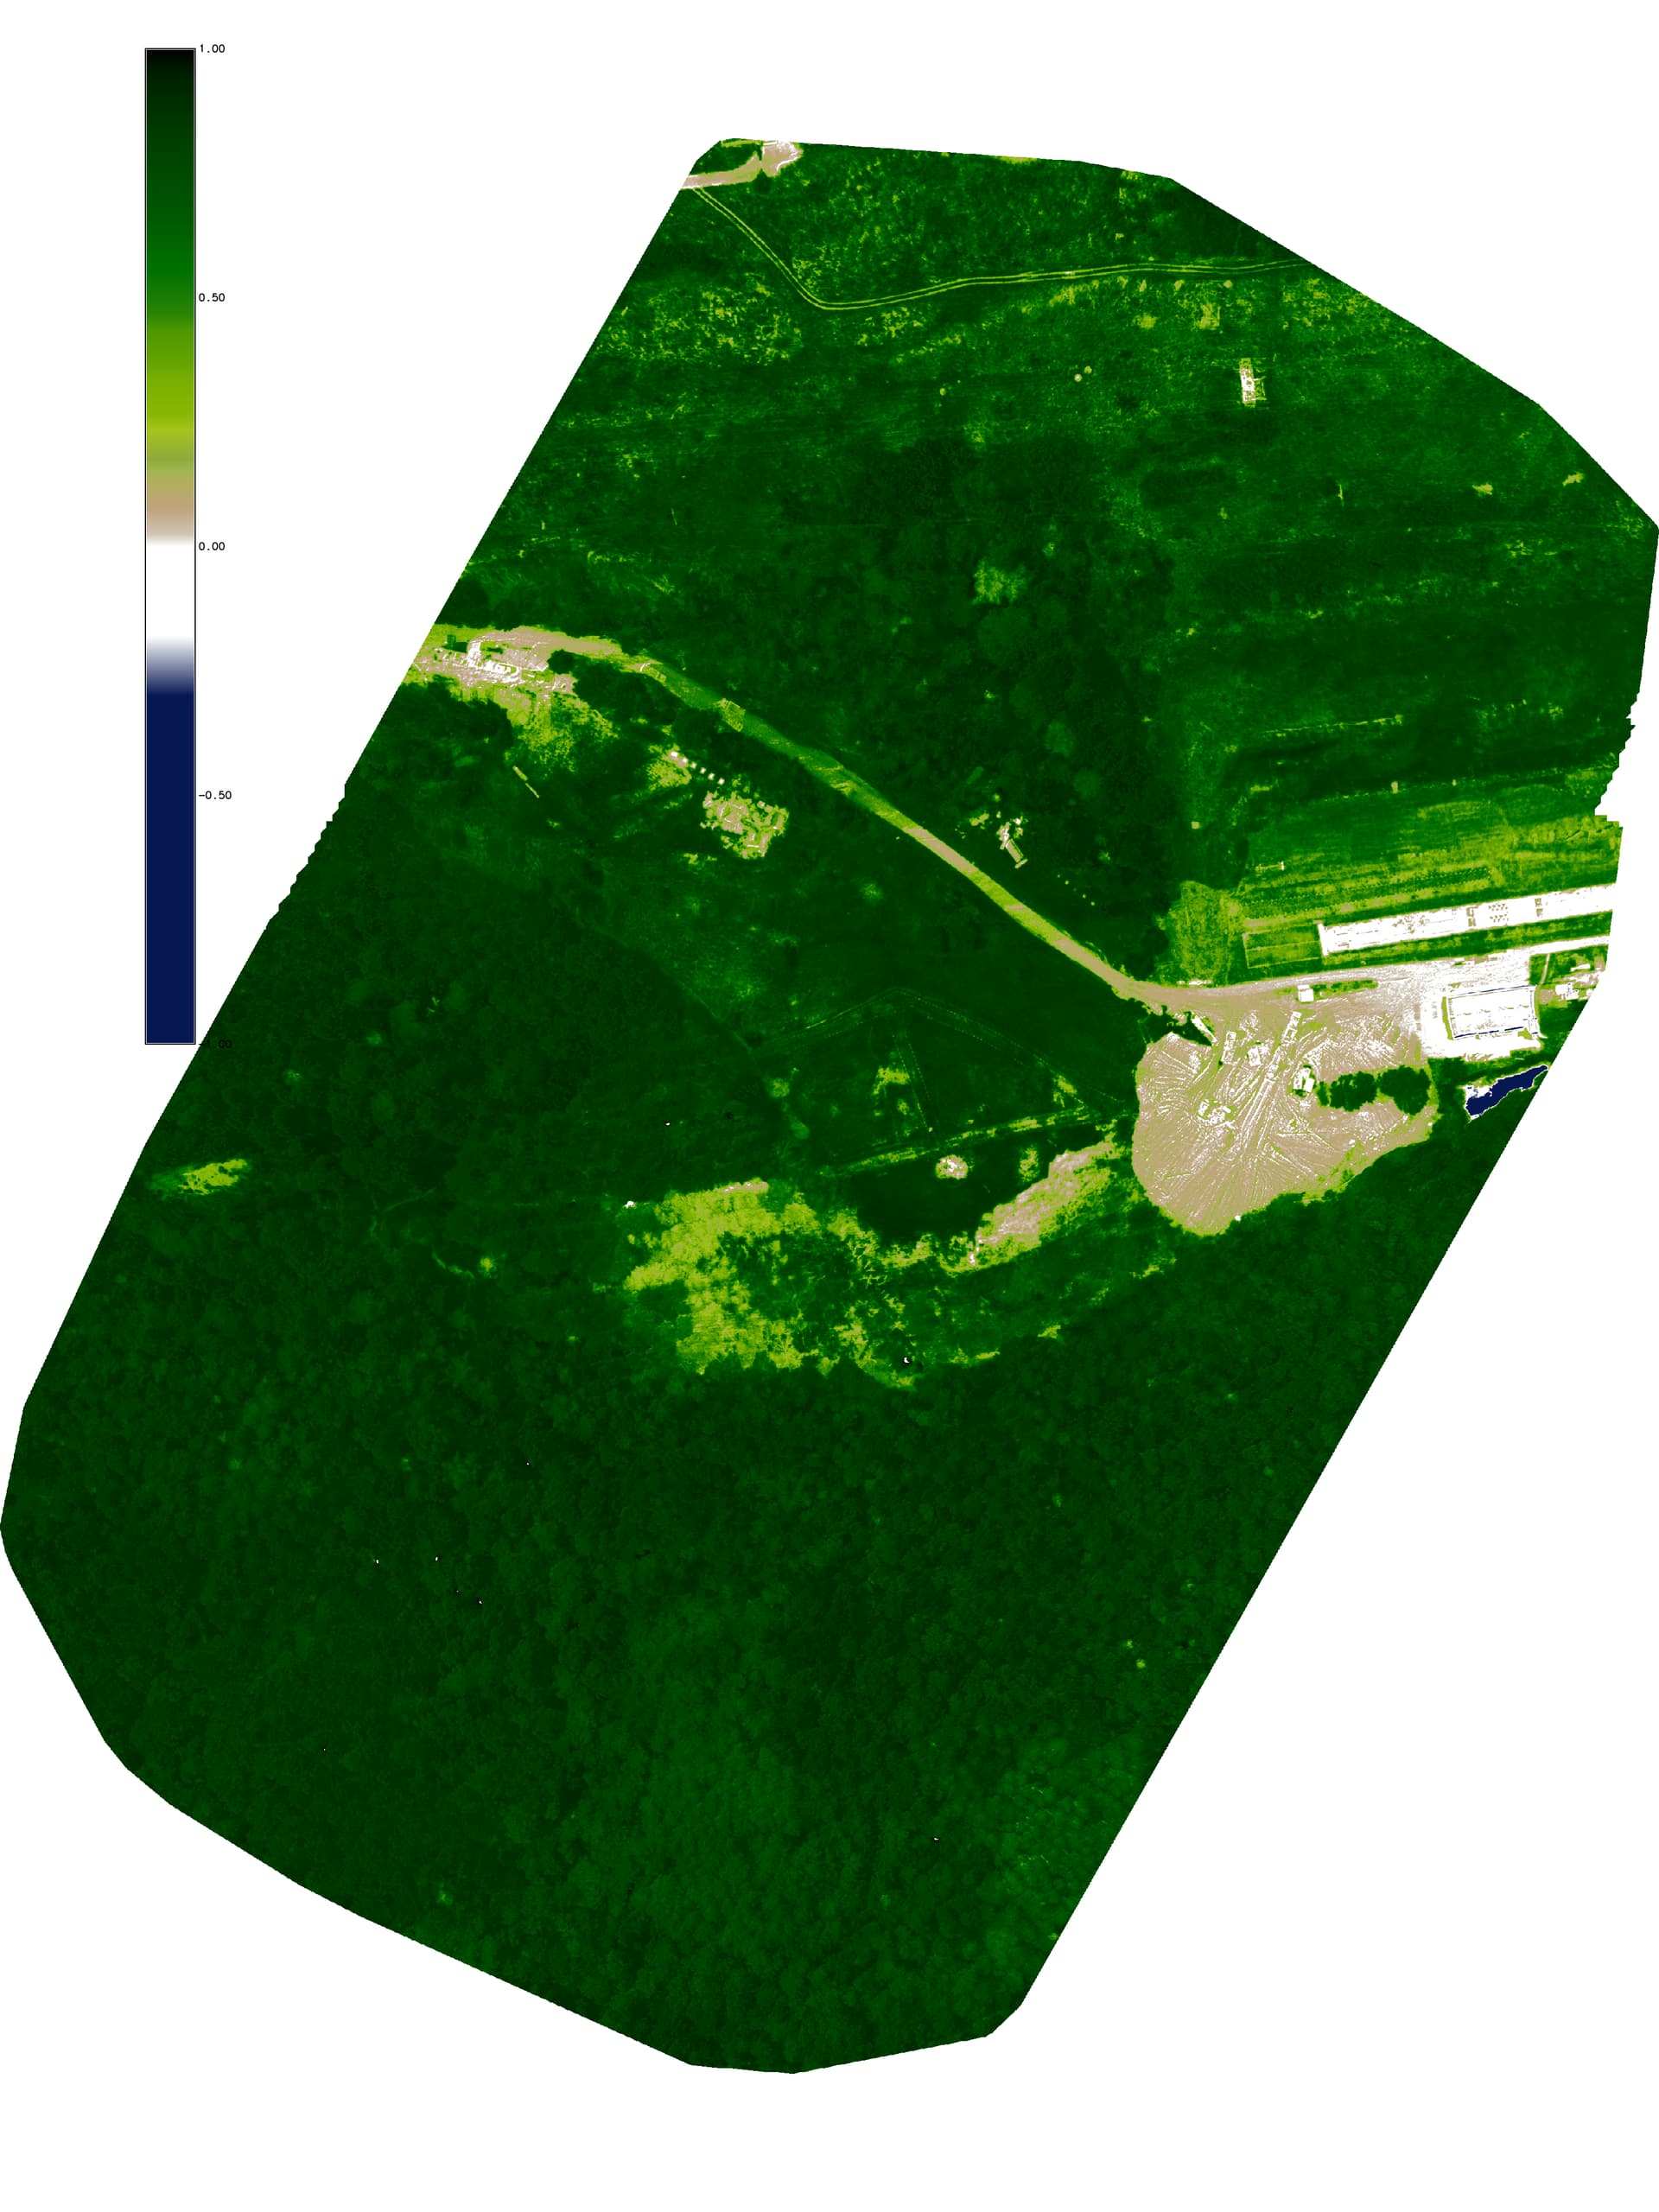
1 Like
Very impressive. This is what I need really. I tried to apply the following options within standard WebODM:
Default - I get purple-colored trees with slight segmentation
Multispectral: texturing-skip-global-seam-leveling: true, radiometric-calibration: camera - I get natural colouring but the strongest segmentation
radiometric-calibration: camera, texturing-skip-global-seam-leveling: false - the best solution so far, but small segmentation present

Could You guide me how to apply Your build?
I have pulled it to docker and run the container. If I understand it right, this is the plain ODM so I need to use command-line interface. Could You provide an example?
2 Likes
Start your WebODM as usual,
execute:
docker run --network webodm_default -d --name node -p 3000:3000 -v ~/:/var/www/data rmitrev/nodeodm_efs:r5a && docker exec -it node cat /etc/hosts
Get ip from output.
then add processing node
Home › Node Management › Processing Nodes › Add Processing Node
Use WebODM as usual.
1 Like
Great thanks for Your assistance. All this stuff is totally new for me. Looks like magic. But it get more sense with each step.
After running Your command I get the following:
127.0.0.1       localhost
::1     localhost ip6-localhost ip6-loopback
fe00::0 ip6-localnet
ff00::0 ip6-mcastprefix
ff02::1 ip6-allnodes
ff02::2 ip6-allrouters
172.18.0.7      df08f3f4175b
If I got it right 172.18.0.7 is IP of a new node. But when I add it as a new node it appears in red with a warning:
172.18.0.7:3000 seems to be offline.
And it is impossible to choose it for work.
Are there some additional steps I’m missing?
1 Like
Try this one:
docker run --network webodm_default -d --name node -p 3000:3000 -v ~/tmp:/var/www/data rmitrev/nodeodm_efs:r5a && docker exec -it node cat /etc/hosts
1 Like