WebODM with DJI Mavic 3 M multispectral, processing and NDVI - newbie

Hello and G’day,

I love seeing MS data like this Arthur_Lemos, looks lovely.

Just want to throw this out to you both yourself and Sickculture, are we still struggling to get camera+sun calibration working? If you’re willing to share a small portion of datasets your working with, I’d be happy to give it a looksie and a spin, see what we can find together!

~C

1 Like

I´ve upload one small area (about 6,2GB) of my forest to my onedrive account for a few weeks (than I will delete this, only for testing). There are RGB and Multispectral images taken with a DJI Mavic 3 Multispectral drone and RTK Sapos signal. Taken on a sunny day for about 4-5 weeks ago.
OneDrive_Forestry_Multispectral_Sickculture

1 Like

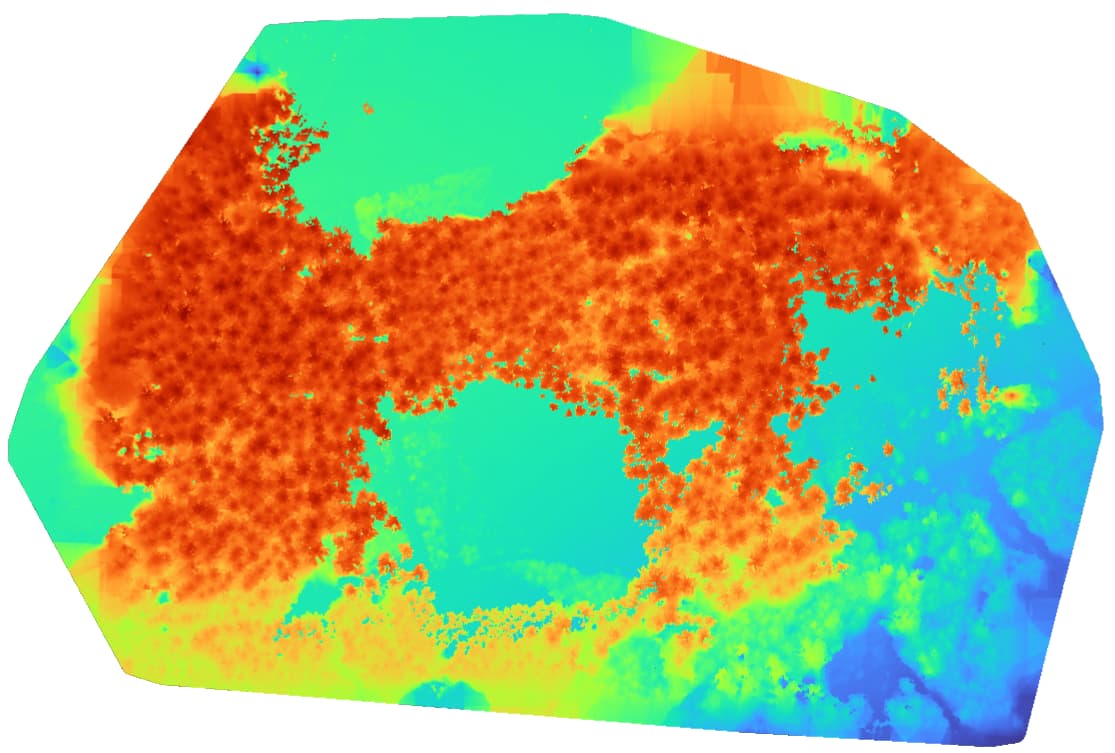
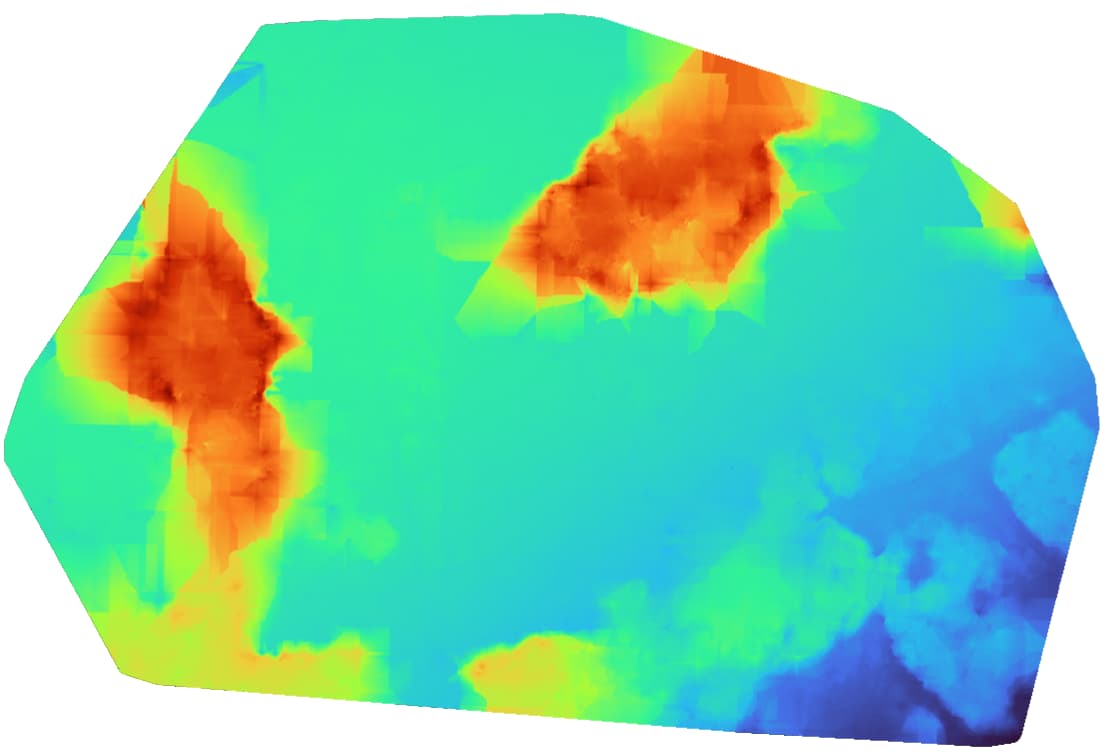
Good news, the dataset you’re using is fine. I would say that for agro-forestry, photogrammetry will have it’s limitations, but we achieved a decent RGB, DSM and DTM:


DTM is still slightly inaccurate, due to photogrammetry limits.

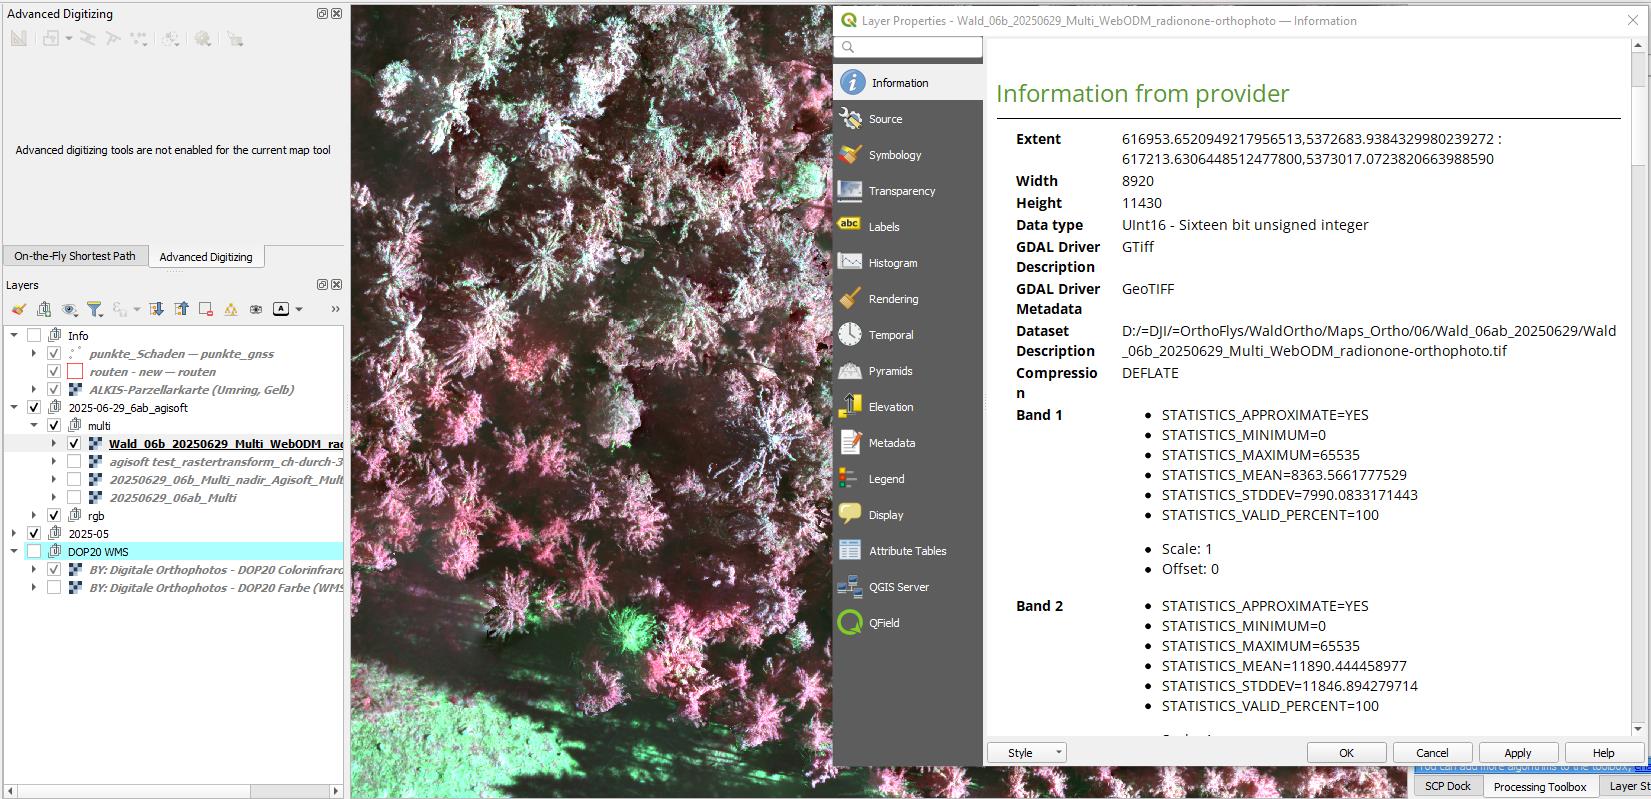
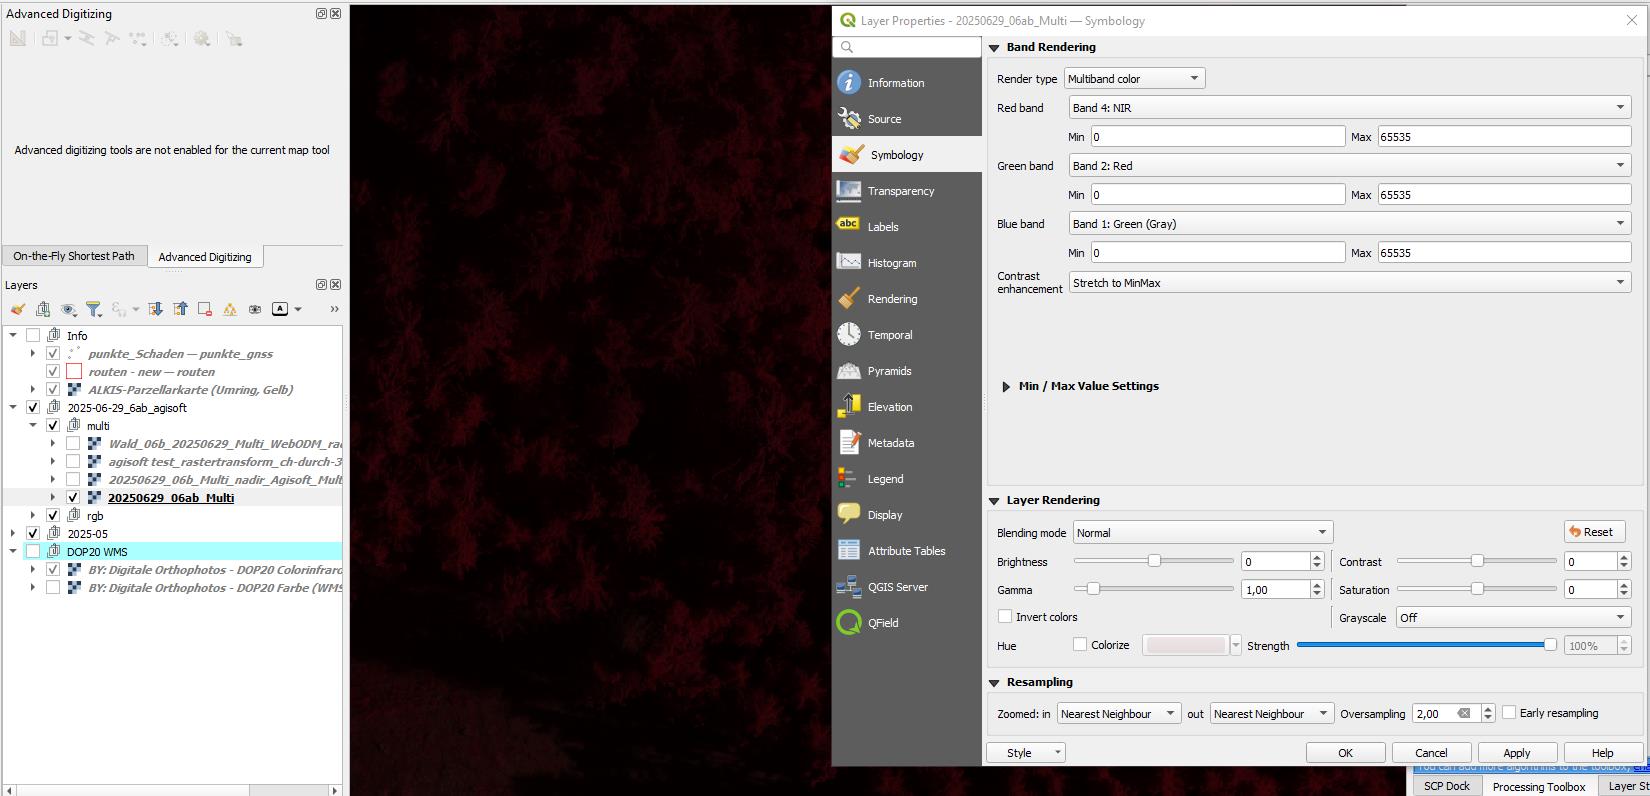
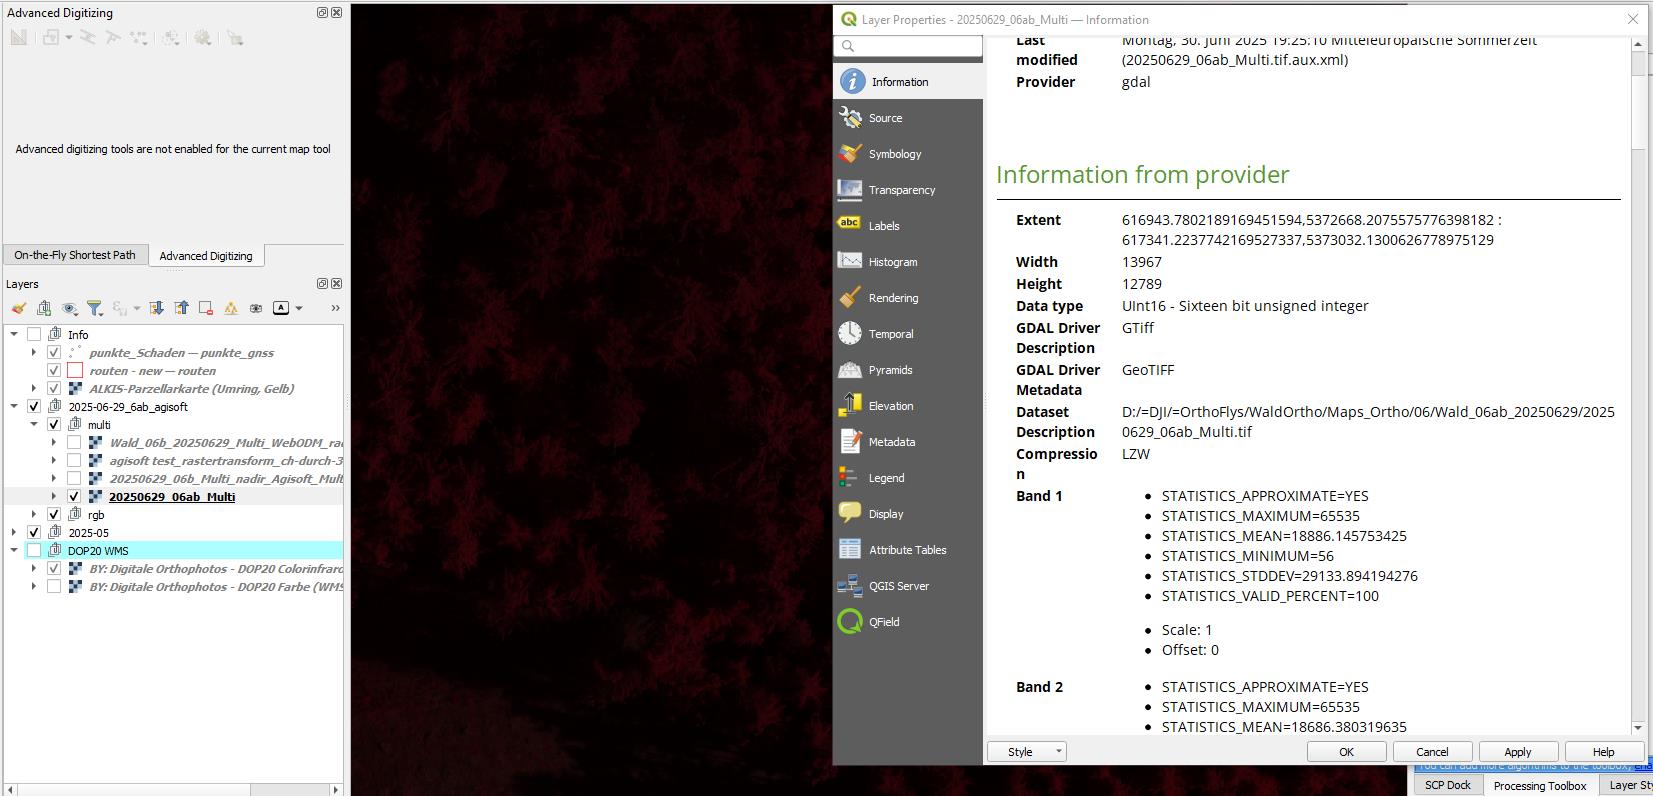
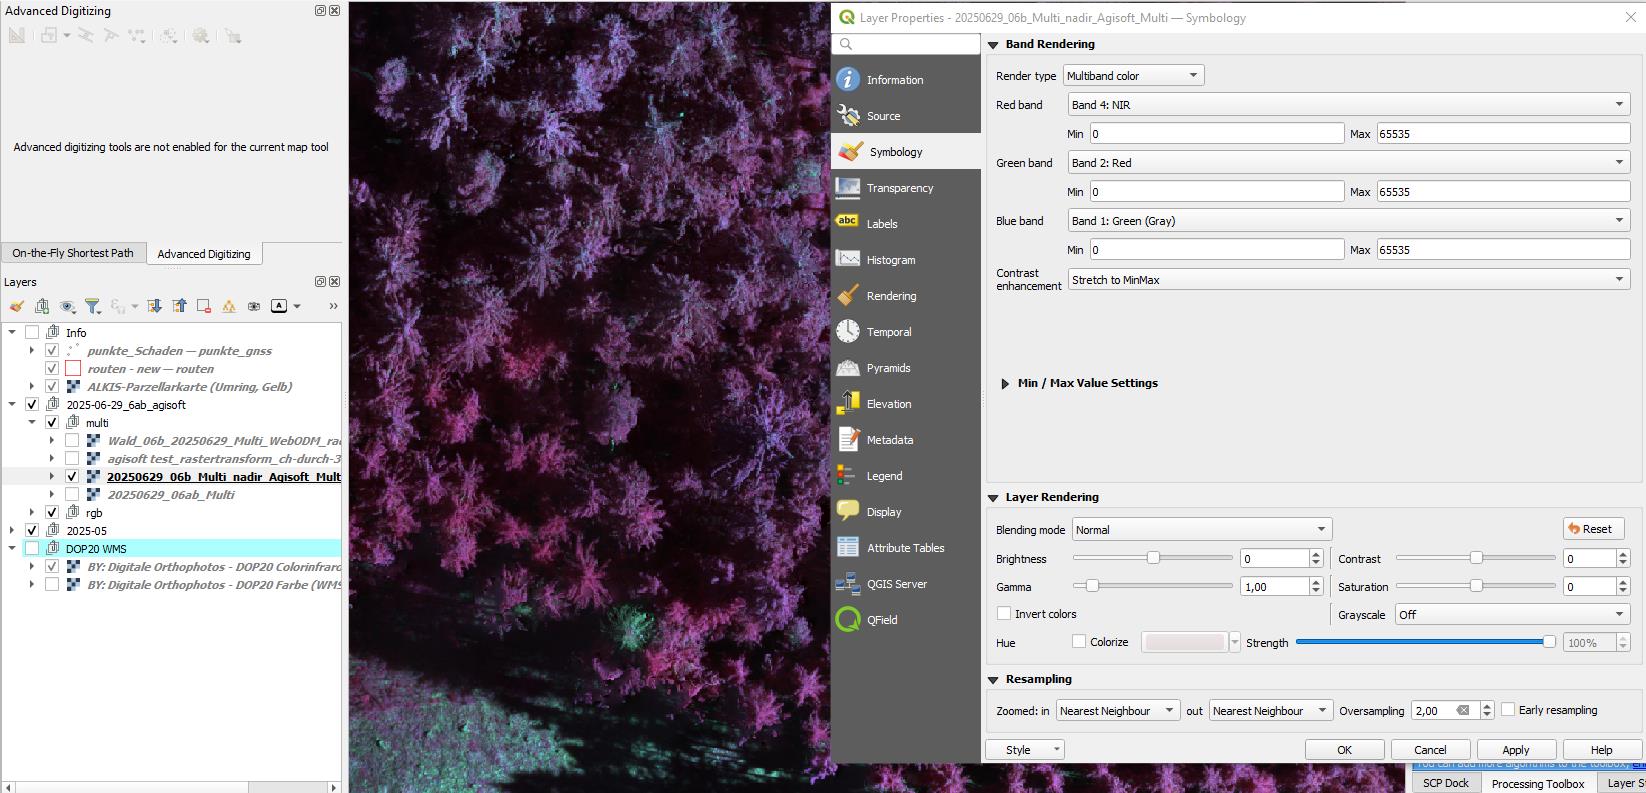
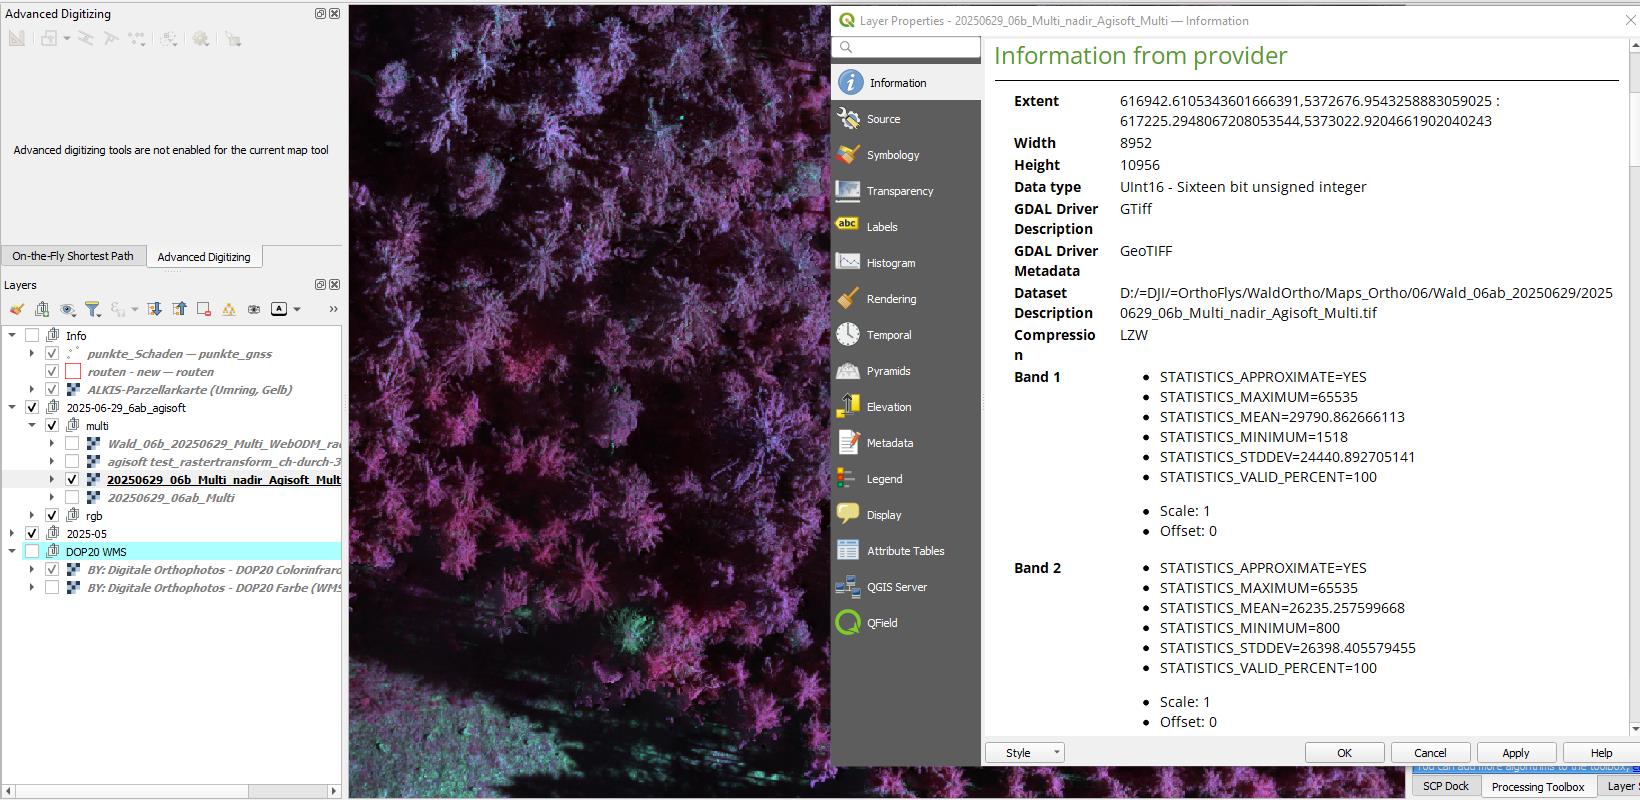
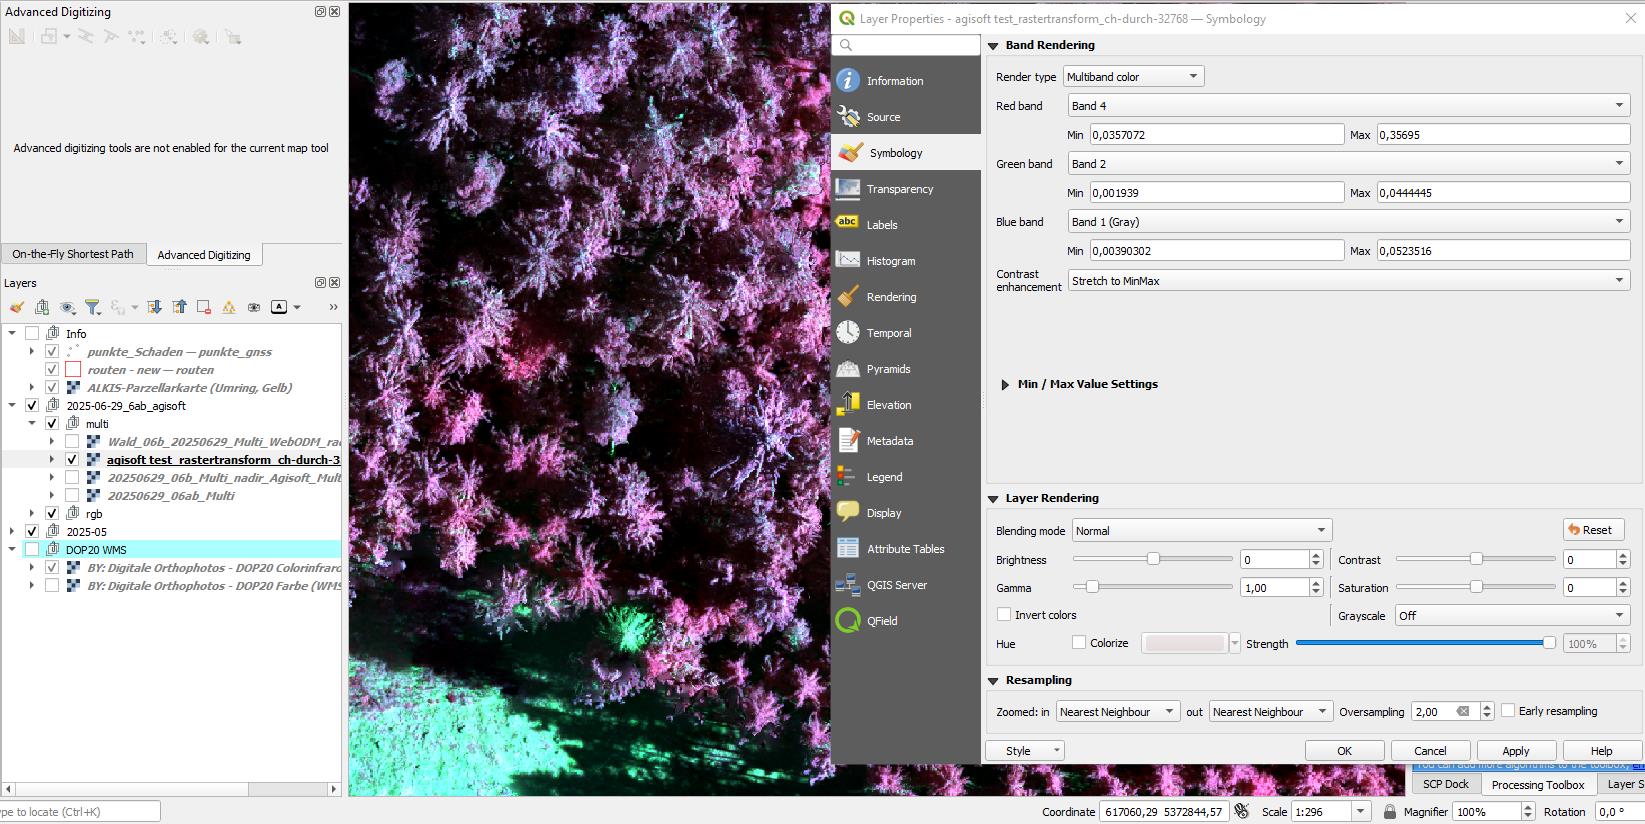
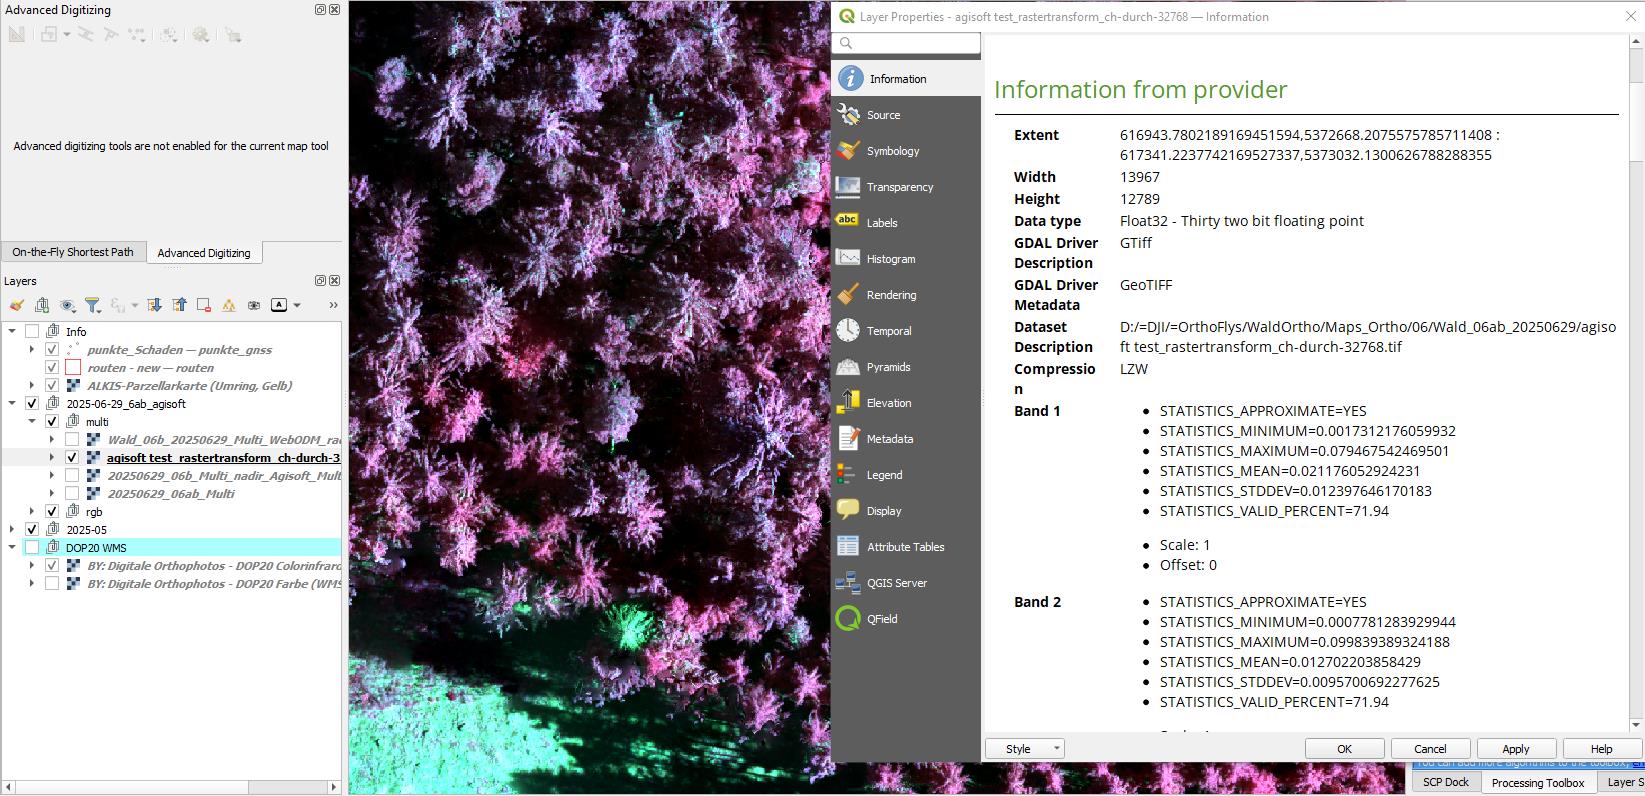
Multispectral worked well too. When checking the bands available through QGIS we get this:

All there.
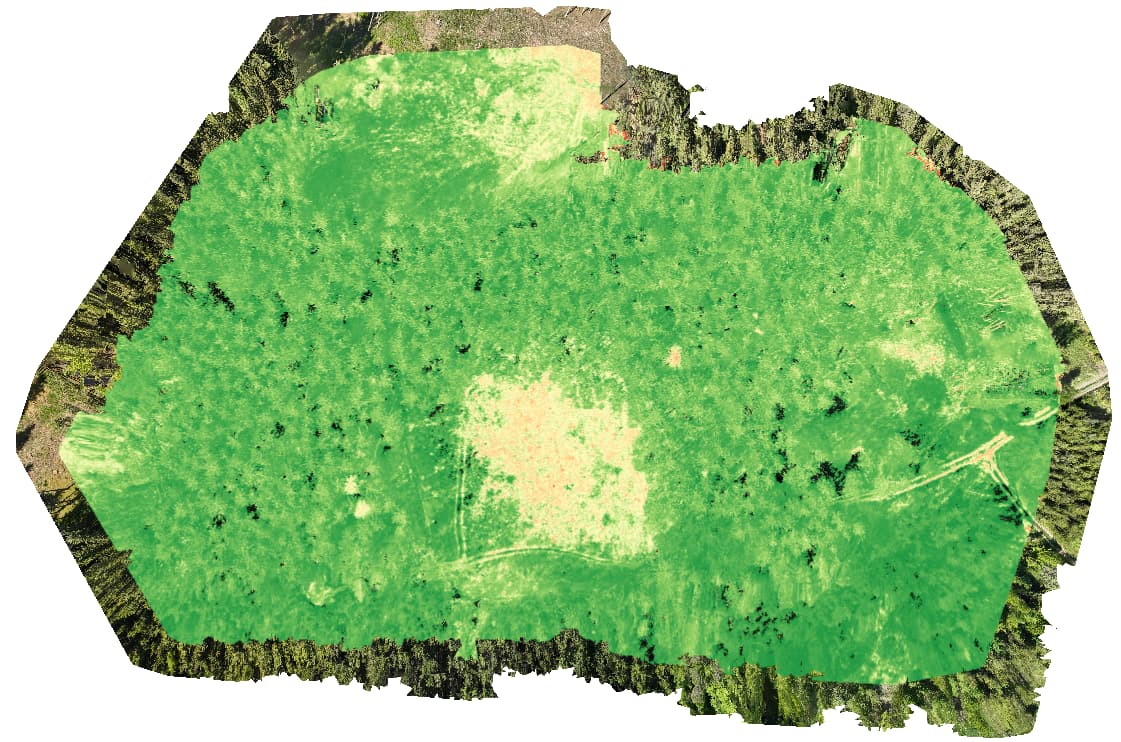
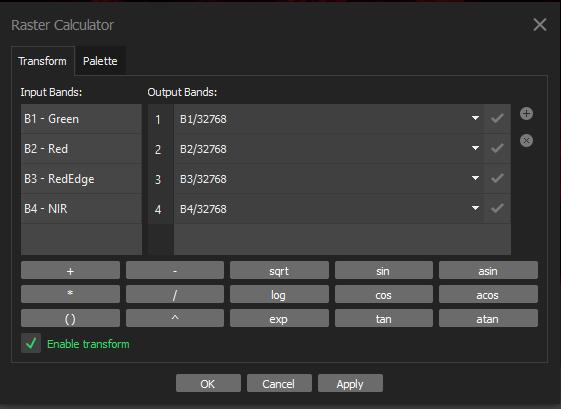
From this we can calculate VIs like NDVI:

RGB used underneath to show the alignment, the RGB sensor on the M3M takes wider/larger pics compared to the MS sensors, naturally you will get a larger margin with the RGB images, something to consider too.

The colour range shown here is between 0-1, but the image does contain values from [-1, 1].
So it all works!

The settings I used to achieve this is:
RGB settings:
docker run -it --rm ^
-v “%INPUT_PATH%:/datasets/project/project/images” ^
-v “%OUTPUT_PATH%:/datasets/project/project/” ^
opendronemap/odm ^
–project-path /datasets/project ^
–dtm ^
–dsm ^
–dem-resolution 3 ^
–dem-gapfill-steps 4 ^
–smrf-slope 0.2 ^
–smrf-scalar 1.5 ^
–smrf-threshold 0.25 ^
–smrf-window 20 ^
–pc-quality ultra ^
–orthophoto-resolution 3 ^
–build-overviews ^
–skip-3dmodel ^
–crop 3 ^
–feature-quality high ^
–optimize-disk-space ^
project

MS settings:
docker run -it --rm ^
-v “%INPUT_PATH%:/datasets/project/project/images” ^
-v “%OUTPUT_PATH%:/datasets/project/project/” ^
opendronemap/odm ^
–project-path /datasets/project ^
–align %RGB_DSM_PATH% ^
–orthophoto-resolution 3 ^
–build-overviews ^
–skip-3dmodel ^
–radiometric-calibration camera+sun ^
–crop 3 ^
–feature-quality high ^
–optimize-disk-space ^
project

Where %RGB_DSM_PATH% is where you can replace with the DSM created from the RGB process.

I have a hunch it may not be the settings you use to process the orthomosaics, but the post-processing. You may find artifacts that stretch beyond the [-1, 1] range. If you clip out those values, I wonder if you get a reasonable result?

I do hope this is understandable, let me know of any queries :seedling:

2 Likes

OK, but you have also values outside -1 till +1 in QGIS while creating a NDVI from multispectral images with camera+sun setting. That´s the reason I have chnage to radiometric:none, because the values I will get out of WebODM (installer version) are a simple 16-bit Geotiff (raw) file and the values are correct between max. 1 and min -1.

also you didn´t use fast-orthophoto and pc-quality ultra. I will check your parameters with mine next processing.

Depends on your goals, if you are seeking just indicative data (maybe just looking for classes of vegetation vs ground cover), then “none” could work for radiometric cali. Anything beyond that, accuracy and assessing plots over different time stamps, then you will need to apply radiometric cali.

Personnally, the M3M does all the calibration work for you and ODM’s radiometric calibration pre-process seems to work perfectly.

As mentioned, the values outside [-1, 1] seem to be artifacts; commonly found at the edge of orthomosaics. Clipping the image to the range will yield accurate and understandable results, similar to what I got.

I actually go a step further and clip for values outside the 2nd to 98th percentile, a little easier to read and clients to understand in a non-dynamic environment (eg. just viewing a Tiff image).

OK, I don´t understand this? In QGIS? What 2nd to 98th percentile?

At the end you think, I should turn on camera+sun? What about fast-ortho? And can you upload your geotiffs in fullres? In this zoom factor it seams perfect, but when you zoom in, are there blury artefacts?

Percentiles are a way to understand how values are spread out in a dataset.

The 2nd percentile means that 2% of the values are lower than that point.
The 98th percentile means that 98% of the values are lower — or only 2% are higher.

So when we clip to the 2nd–98th percentile, we’re trimming the lowest 2% and the highest 2% of values — the extremes — to focus on the more meaningful middle range.

To reduce the impact of extreme outliers and improve visual consistency, I clip the NDVI values to the 2nd and 98th percentiles. This means any pixel values below the 2nd percentile or above the 98th are set to those threshold values, effectively removing statistical noise caused by the photogrammetric process or reflective artifacts.

Look I use camera+sun, it’s up to you. I don’t use fast-ortho, my goals are accuracy over speed to generate maps.

Uploading them now to your OneDrive, should be done in 10ish mins.
there are absolutely blur and seamlines, but this is a limitation of nadir photos photogrammetry. Majority of this blur happens on the margin lines, the outside edges of your target

OK, same there. I´ve also these blury artefacts. The 2nd/98th cutting I will take a look. Can you do a screenshot for me to understand you setting in QGIS for this?

One question about the artefacts:
I´ve read some threads, where a second/third misson in -80 gimbal pitch and a -10 degree route in 10% lower elevation is good for photogrammetry. What do you think? My goal is to produce orthomosaics (no 3D at the moment). Or is it better do fly in doublegrid with 90 or 45 degree in 2./3. mapping?

Hello, late reply.

I don’t use QGIS to create my vegetation index rasters, I find the process slow and manual. Have a look into automation code, I use GDAL to create and clip my rasters.

Yeah I’m unsure of the 2nd flight mission, I’m going to have a look through this forum further. I’ll let you know if I find more info.
I tried the 2nd mission at -80deg and it didn’t work.

I was reading for 2D it’s recommended to do just one flight mission at 80% overlap at slightly off NADIR (5-10deg). I’ll give this a try myself.

1 Like

I have done a second mission on same areas now with two different altitudes and one with -80degree gimbal pitch. It´s still running on my workstation.
but I´ve one big question again about my multispectral images:
you turned on “camera+sun”. The geotiff(raw) is 32bit, right? You import this file in QGIS and calculate the NDVI. But I also need a simple false colored infrared image for bark beetle detection. It´s a simple method with changing the order of bands in channels:
Red channel:NIR
Green channel: Red
Blue channel: Green
But this won´t work with camera+sun. I´ve also test this with agisoft (sun sensor calibration active). I think it´s a problem with 32bit and QGIS. Perhaps you can render the multispectral images again with camera+sun setting and change the bands in QGIS? My onedrive folder is still available.

I´ve done a mission and normaly I process my images in WebODM (rgb+multispectral separate jobs). I don´t use a reflectance panel, only the sun sensor on top of the drone. My goal is to create a false color infrared image (CIR, R:NIR,G:red,B:green). When I process the multispectral images, I must deactived radiometric calibration and set a style in QGIS to get the attached results. Now I´ve tested also Agisoft Metashape Pro. First I create multispectral orthomosaic with these parameters (https://agisoft.freshdesk.com/…/31000159853-dji-phantom…). I will get a dark 32bit image with extreme red after I ordered the bands in QGIS. Than same processing but without reflectance calibration (no sun sensor active). Now it´s better but darker than WebODM. After I have read this article (https://agisoft.freshdesk.com/…/31000148780-micasense…) I´ve open my first Agisoft Job and insert a raster calculation in Agisoft with each band divided by 32768. I´ve load it in Qgis and apply the bands in right order. Now it´s a sun senor calibrated image. But it´s darker than WebODM.


This topic was automatically closed 30 days after the last reply. New replies are no longer allowed.